
When it comes to music production, drums are the heartbeat of your track. Crafting the perfect drum mix requires skill, patience, and the right tools. In this comprehensive guide, we’ll explore essential tips and tricks for achieving a powerful drum mix. Whether you’re working in rock, pop, hip-hop, or electronic music, these insights will help you kick up your drum mixes to professional standards.
In This Article:
- Step 1: Correct Phase Problems
- Step 2: Remove Unwanted Noise
- Step 3: Subtractive EQ
- Step 4: Additive EQ
- Step 5: Channel Compression
- Step 6: Reverb
- Step 7: Parallel Compression
- Step 8: Buss Compression
- Step 9: Add Beef and Aggression with Saturation
- Step 10: Set Automation
Subscribe to our newsletter to get more production insights like these in your inbox!
Step 1: Correct Phase Problems
Phase issues can cause certain frequencies to sound unbalanced or disappear altogether. This is common in drum recordings due to the varying distances between drum kit pieces and microphones. Use Precision Time Align to align overheads and other mics to the snare, ensuring a clean, cohesive sound.

Start by soloing the kick and snare mics, using the Coarse Adjust slider to align the phase, and adjusting the Fine Adjust to zero in on the phase issues until they’re minimized. Check the overheads and room mics, making fine adjustments to ensure all drum elements are cohesive and punchy, enhancing the overall tightness and impact.
Step 2: Remove Unwanted Noise
Dynamics processing can be applied before or after equalization—each method sounds different, so experiment to see what works best. Recorded drums often contain bleed from other drums, and using a gate or expander gives you control over the unwanted audio spill. Having a channel strip plug-in, such as the UltraChannel, across your drum tracks helps streamline the mixing process and ensures a consistent, cohesive sound across all your drum elements. Using the gate, start by dialing up the threshold until the bleed is muted, then fine-tune the release time to shape the tightness.
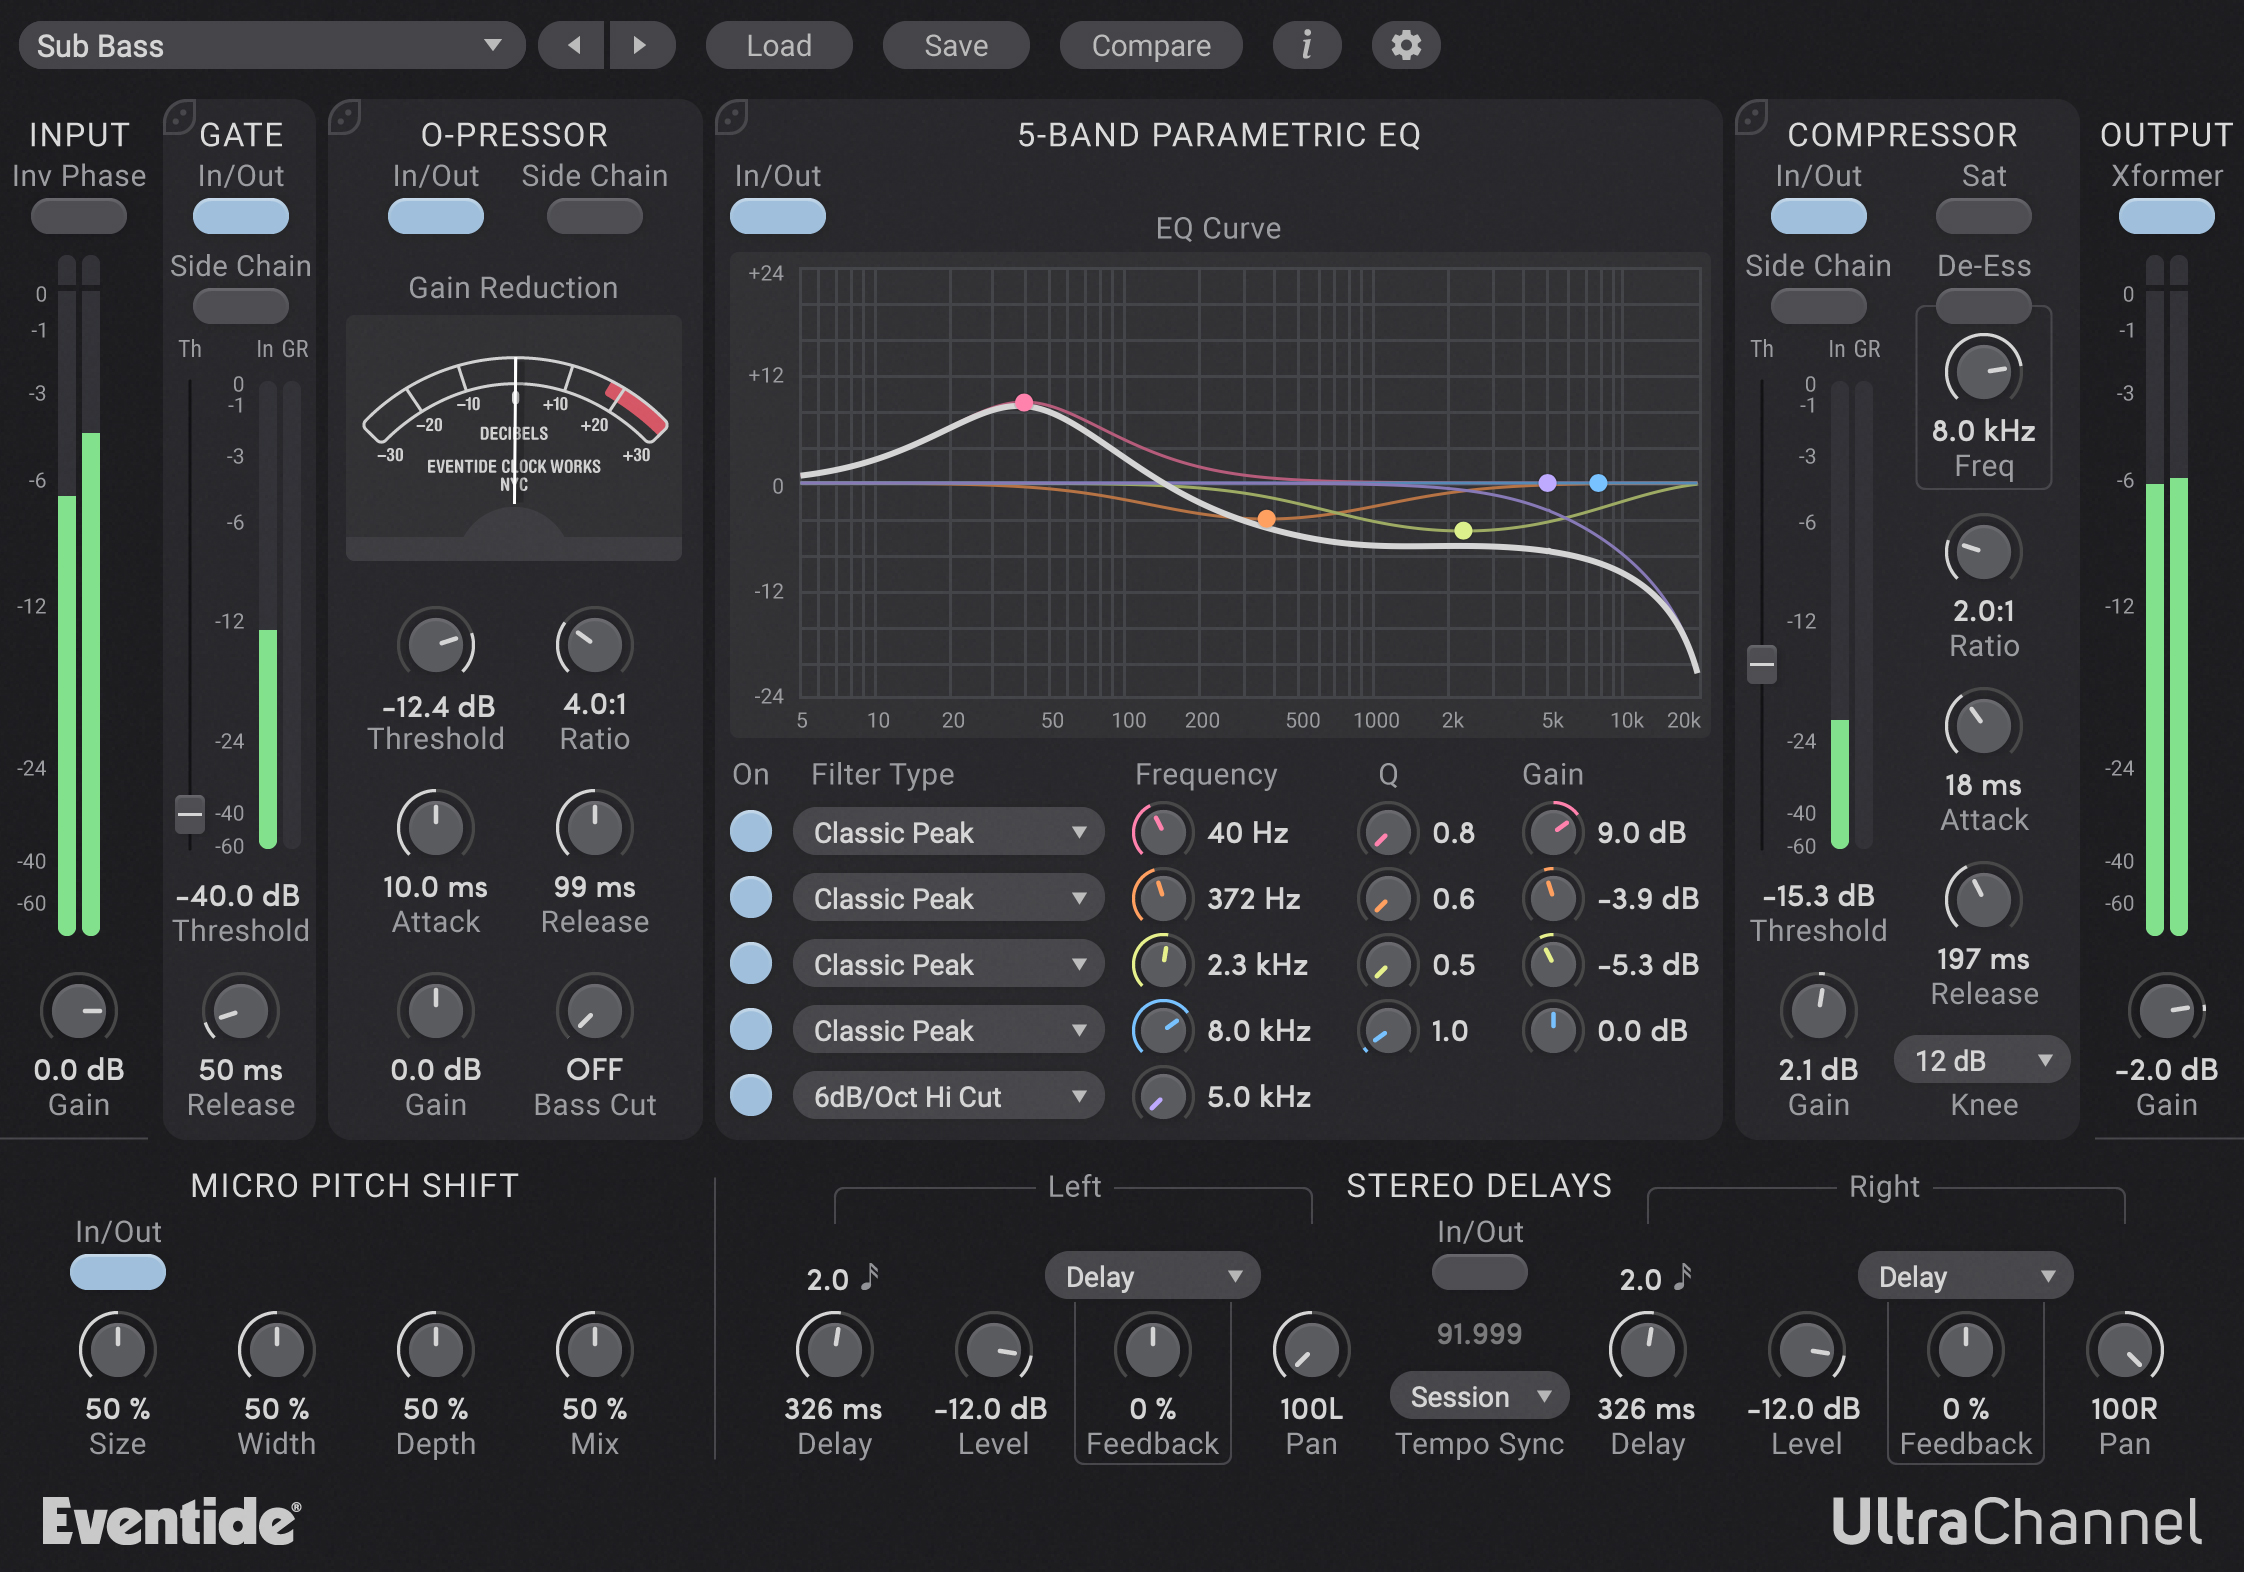
Step 3: Subtractive EQ
Subtractive EQ helps remove the problematic frequencies of your drum mix. Using the UltraChannel’s built-in EQ, choose a band that corresponds to the problematic frequency range. Set the band to a bell shape, increase the gain, and slightly narrow the Q. Now slowly move the band back and forth, or “sweep” through the frequency range to identify the offending frequency. Once you find it, lower the gain to subtract the unwanted frequency. Start with 2-3 dB reduction and repeat this process on other frequencies where needed.

Step 4: Additive EQ
Additive EQ enhances specific areas of your drum mix. On the UltraChannel EQ, choose a frequency range to boost, then fine-tune with the Q for precise control. Play the full drum mix back, listen, and make adjustments to check for clarity while avoiding harshness. Focus on these frequency areas for each drum:
- Kick:
- Lows (50Hz – 100Hz): Adds power
- Low mids (100Hz – 250Hz): Adds fatness
- Midrange (400Hz – 800Hz): Avoid boxiness
- High mids (3kHz – 5kHz): Adds snap
- Snare:
- Low mids (100Hz – 250Hz): Adds fatness
- Midrange (400Hz – 1kHz): Finds the fundamental ring
- High mids (3kHz – 5kHz): Adds snap
- Highs (10kHz): Adds air
- Toms:
- Lows (65Hz – 100Hz): Adds power
- Low mids (100Hz – 200Hz): Adds power to rack toms
- Mids (400Hz – 800Hz): Avoid boxiness
- High mids (5kHz – 7kHz): Adds snap
- Cymbals/Overheads:
- Low mids (200Hz – 500Hz): Adds meat
- High mids (3kHz – 5kHz): Adds presence
- Highs (7kHz – 12kHz): Adds air
Step 5: Channel Compression
Shaping dynamics with compression is crucial for a polished drum mix, ensuring balance and punch throughout the track. To further streamline the process, use UltraChannel’s built-in O-Pressor and start by adjusting the attack and release times to enhance the drums’ dynamics:

- Kick:
- Threshold: Just below the peak level.
- Ratio: 4:1 for punchiness.
- Attack: 10-20ms to let the initial hit through.
- Release: 50-100ms for natural decay.
- Bass Cut: Engage to avoid low-end muddiness.
- Snare:
- Threshold: Slightly below the peak.
- Ratio: 4:1 to 6:1 for tightness.
- Attack: 5-10ms to keep the snap.
- Release: 100-200ms to maintain the body.
- Bass Cut: Use to reduce low-end bleed from the kick.
- Toms:
- Threshold: Below peak hits.
- Ratio: 3:1 to 5:1 for control.
- Attack: 5-15ms for transient presence.
- Release: 100-150ms for natural resonance.
- Bass Cut: Apply to prevent low-end buildup.
- Overheads:
- Threshold: Set for subtle compression.
- Ratio: 2:1 to 3:1 for glue.
- Attack: 20-30ms to retain transients.
- Release: 200-300ms to smooth out dynamics.
- Bass Cut: Engage to focus on mid and high frequencies.
Fine-tune the settings based on the specific mix context and desired sound.
Step 6: Reverb
Adding reverb can enhance drum tracks by creating a sense of space and depth, making the mix feel more natural and cohesive. Insert a reverb, such as the UltraReverb, on an aux track. Start with a 1.2-1.5 second decay time for a natural room feel. Set the pre-delay to 10-20ms to keep the initial attack clear. Set around 200-250Hz to prevent low-end buildup, and the mix to 100% wet since it’s on an aux track.

Next, start sending individual drum tracks to a reverb aux. On your snare track, dial up a subtle amount on the send to add depth to the snare without overwhelming the mix. Avoid adding reverb to the kick to maintain its punch and clarity. For toms, apply a slight amount to enhance their presence and a light amount to the overheads to blend the kit together, ensuring it complements rather than dominates. Adjust the pre-delay and decay times to fit the track’s tempo and style, and consider high-passing the reverb to prevent low-end muddiness. This approach ensures each drum element retains its distinct character while contributing to the overall mix’s depth, creating a balanced and polished sound.
Step 7: Parallel Compression
Parallel compression thickens and livens up the drum sound, making it more powerful and cohesive. To set up, create an aux track and send various drum channels to it. Insert the Omnipressor®, an iconic dynamic shaper known for its flexibility to act as a compressor, expander, limiter and even reverse dynamics. Unlike other compressors, it has the unique ability to drastically alter the envelope of a sound, allowing for creative shaping of the drum mix and adding liveliness while retaining the original dynamics.

First, dial the Function knob to the slight right to enact compression. Set the Threshold to capture peaks, the Ratio to 4:1 or higher for punch, and adjust Attack and Release to suit the drum mix. Parallel compression with Omnipressor enhances the energy and presence of drums while preserving dynamics. Experiment with settings to blend the compressed signal back into the original mix, achieving a vibrant and impactful drum sound that stands out.
Step 8: Bus Compression
Bus compression glues the drum kit together for a cohesive sound. Using Newfangled Audio’s Invigorate is perfect for this, as it enhances the tone and dynamic impact of the overall drum mix without sacrificing the natural punch and clarity. It’s also easy to pick up and achieve professional-quality results if you’re a beginner. Watch and learn how to use Invigorate to add excitement and energy to your drums:

Start with a low ratio, around 2:1, to maintain dynamics while adding control. Set the attack time slow, between 20-30ms, to let the initial transients punch through. Adjust the release time to match the track’s tempo, typically between 100-200ms, to ensure a natural decay. Fine-tune the threshold until you achieve a few dB of gain reduction, adding subtle compression that glues the drum tracks together without squashing their energy.
Step 9: Add Beef and Aggression with Saturation
To add aggression to your drum mix, use parallel saturation. This method adds harmonic content to the drum signal, enriching the sound with additional overtones that create a fuller, more complex texture. The Saturate plug-in offers precise control over the added harmonic content, allowing you to make finely tuned adjustments that can enhance the drum mix without introducing unwanted artifacts or distortion.

Create an aux send from your drum tracks to an aux track and insert Saturate. Adjust the plug-in’s- drive and shape parameters to introduce harmonic saturation that thickens and colors the drums. Blend this distorted signal back with the dry drums to add extra impact. Though distortion is often considered undesirable, it enhances a drum mix by adding harmonic richness and grit, making the drums stand out. Fine-tune the balance between the dry and distorted signals to achieve the desired level of aggression and presence in your mix.
Step 10: Set Automation
Fine-tuning your drum mix with volume automation is key to keeping the mix lively and engaging. By adjusting the levels of individual drum channels throughout the song, you add dynamics and impact, making the drums feel more alive and evolving rather than static. Automation creates replay value by introducing subtle changes that keep listeners engaged. Think of it as giving your drums a heartbeat, ensuring they drive the track with a sense of movement and life. Small adjustments can make a significant difference, transforming your mix from predictable to dynamic and keeping every beat fresh and exciting. So, embrace automation—it’s the secret sauce that breathes life into your drums.
By following these steps, you’ll be well on your way to achieving professional-sounding drum mixes. Experiment with settings, trust your ears and let your creativity guide you to the perfect drum sound.


